

DIY Keezer
- Feb 26, 2016
- 3 min read

This has been a looooooong week, every day has felt like a Monday...and it's FRIDAY! Ugh. So, after a long day/week our homebrew was calling my name. Several weeks ago Brad finished his Keezer and it came out beautifully--I mean rugged and manly. Anyway, I can barely take credit for any part of this because it was his idea and his design. It couldn't be more simple though.
First things first, you'll need a chest freezer. Ours is about a 10 cubic foot freezer because we wanted it to hold 5 taps on the outside, but 6 kegs, carbon dioxide tank, and a carboy. A chest freezer isn't tall enough to allow the attachments on top of the kegs to fit with the lid closed. So, as many people do, we built a collar to go around the freezer. This lifted the lid 6 more inches allowing plenty of room and a place to drill holes for our taps. Here is what we did and by we I mean my husband.
DIY KEEZER
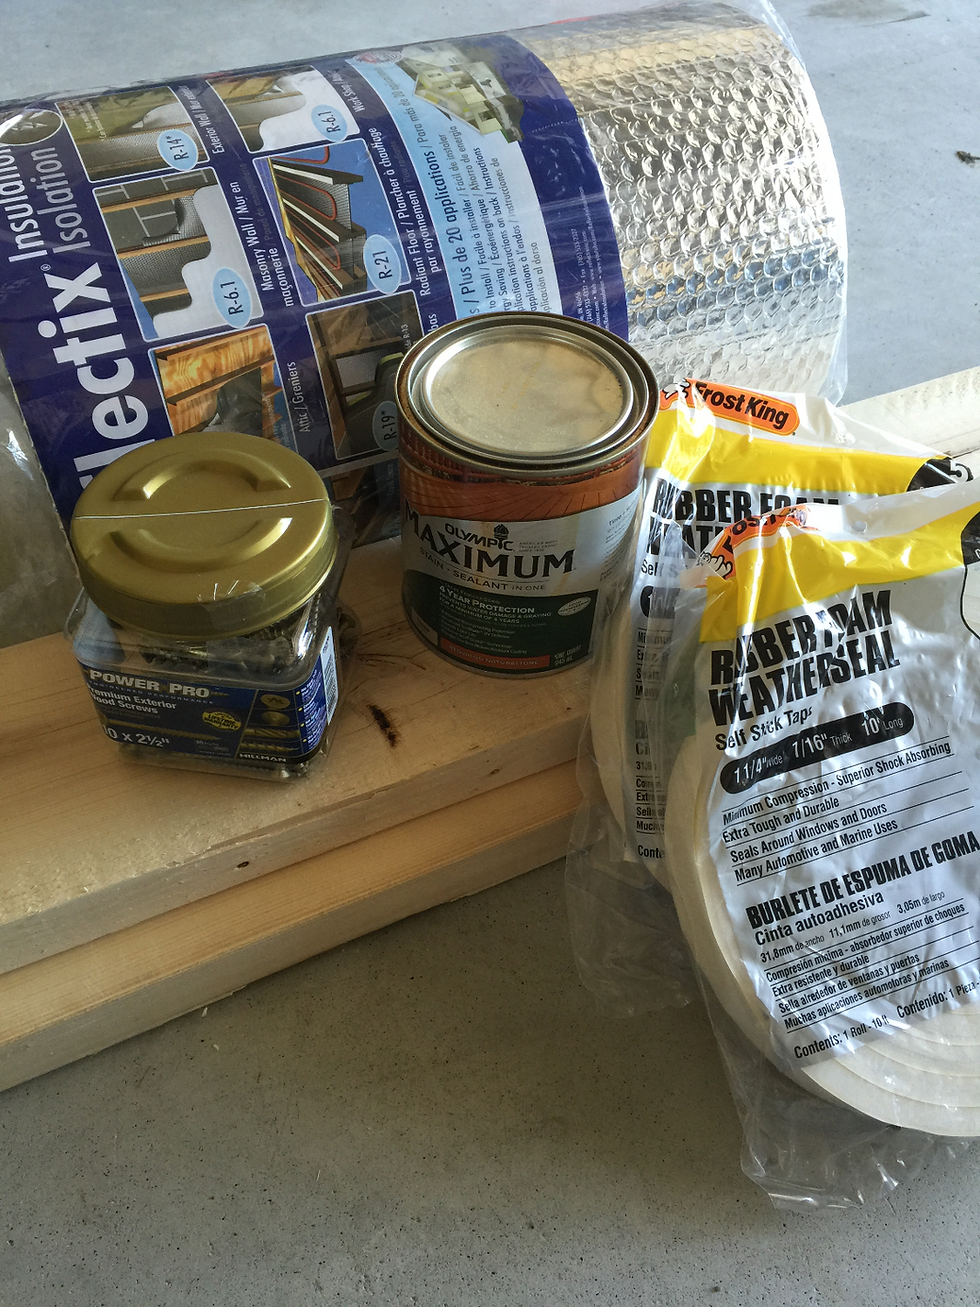
Supplies:
-2x6
-Stain
-Silicone Caulking
-Rubber Weather Stripping
-HVAC Repair Tape
-Reflectix Insulation
-Wood Screws
Directions:

1. Remove lid of freezer.

2. Measure and cut your wood on a 45 degree miter. Be sure to check your sizes against your freezer as you go to prevent you from getting too far and realizing something didn't measure up.

3. Drill pilot holes and attach boards using wood screws.


4. Measure and mark where you want to drill the holes evenly spaced apart and drill the holes using the appropriate gauged bit or a hole saw that is the size of your shank on your tap. Also drill a hole for your thermometer to fit through in the back for your temperature gauge.

5. Sand your collar until smooth. Brad is a perfectionist and sanded it down until it was super smooth. Even rounded the edges so drunk people wouldn't scratch themself.

6. Stain it. The trick with staining, at least that we have found, is to brush it on and then wipe it off shortly after application. We used a stain and sealant in one because we have about a billion cans of stain from the thousand of projects we've done in the past. Let stain dry completely, ours took 2 days because it was so cold outside.

7. Attach rubber weather stripping onto bottom of collar.
8. Place collar onto freezer.

9. Caulk weather stripping around outside with the silicone. We like the silicone because it's waterproof. Be sure to smooth it out so it looks pretty and seals properly everywhere. We actually already had the silicone caulk after fixing some places on our kitchen counters, but the tip wasn't working and had completely dried. Thanks to my stroke of genius we cut open the tube and scraped it into a disposable piping bag. It worked great!


10. Once silicone is dry attach your taps adding more silicone inside the hole around the shanks and tighten. Thread your thermometer into its hole and add more silicone around the wire. Let everything dry.


11. Be sure everything is completely dry. Cut your laminate down to size and attach using a staple gun, be sure to fold it up around the shanks of your taps and wire of your thermometer. Use your repair tape to seal the edges of the laminate.

12. Reattach your lid now to the wooden collar. If you're still unsure about your collar staying put you can attach a small piece of wood from the collar to the base of the freezer.

Now you can enjoy your homebrew whenever you want! It's so exciting having beer on tap. Bad day? Oh well, go to the garage and get you a beer.
Here is what we spent:
Rubber Weather Stripping (2 total-$9 each) $18
Reflectix Laminate $24
HVAC Repair Tape $8
Chest Freezer $280
Digital Thermometer Gauge $75
2"x6"x8' Untreated Boards (3 total-$5 each) $15
TOTAL = $420 including freezer and thermometer gauge
$65 for just collar
Comments